How to use the ease Uninsurance app
How to use the ease Uninsurance app
Below is an ELI5 step-by-step walkthrough of how to use the Ease Uninsurance App.
If you have any questions, please reach out to our support team on Discord or Twitter.
Connecting your wallet
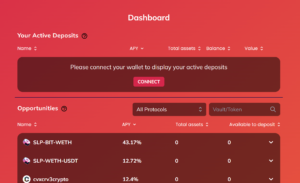
If you visit app.ease.org, then you can immediately see the open vaults and their APYs, listed under “opportunities”.
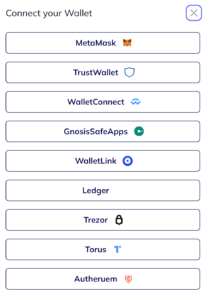
Your wallet can be checked for suitable tokens. To do this, or to check your balances or interact with the app in any way, you will need to connect your wallet first.
You can use the [CONNECT] button in the app itself, or the one in the top menu.
![]()
Once you click either button, a list with possible wallets will pop up and you can choose which wallet you want to use
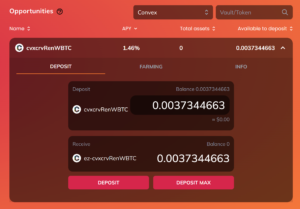
Your dashboard
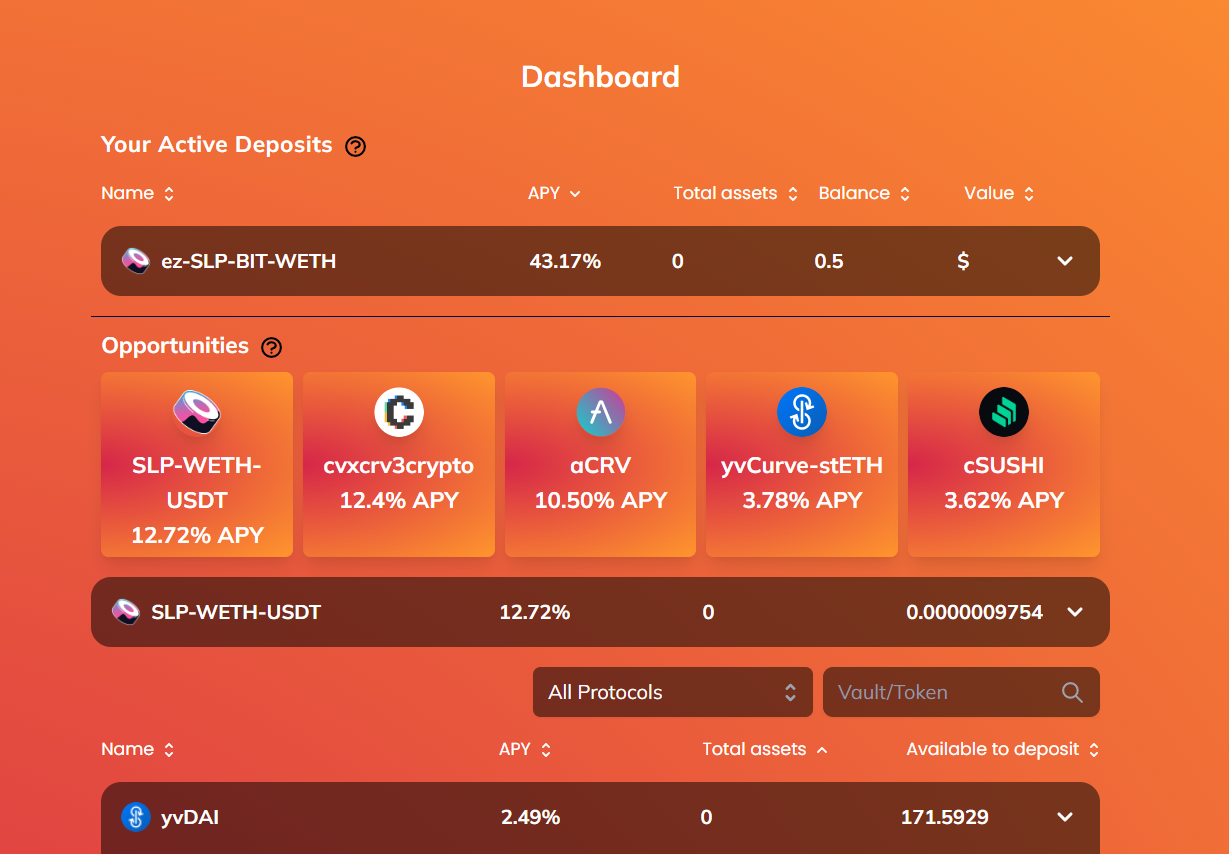
After connecting your wallet you will see a dashboard similar to the one below.
- Your active deposits will be displayed up top, with opportunities for deposits right below that.
- The 5 top-earning opportunities -with the highest %APY- will be showcased in tiles at the top.
Vault Dropdown Panel
Clicking on a new deposit opportunity will expand the tab. All of the vaults have 3 or 4 subtabs available with the following information and options:
-
- Deposit: deposit underlying assets into the ecosystem and get covered and yield-bearing ez-tokens in return.
- Withdraw: withdraw your deposited tokens. This tab will only appear once you have deposited tokens.
- Farm: stake Ez-tokens to earn rewards (TBA).
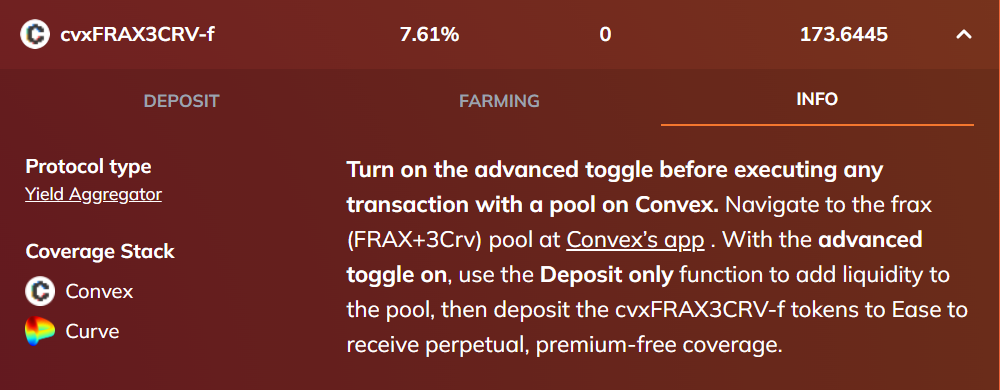
- Info: this section contains information about the vault and how to use it:
- Instructions on how to get the underlying assets.
- The protocol type (referring to the top protocol)
- A list of all the protocols that are covered once you deposit to this vault, the so-called Coverage Stack.
An example of a Vault info tab is displayed below:
Agreeing to the terms of use
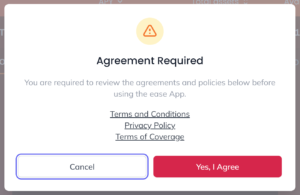 Before the first interaction with the app, a popup will occur:
- A user must agree to the following before depositing underlying assets into the Uninsurance ecosystem.
Once you click the [Yes, I agree] button, you can start using the app. This pop-up will only show once per user/browser, but if you don’t accept or clear cookies, it might show more often.
Deposits
Once you have your wallet connected and you have suitable tokens in your wallet you can deposit them and get ez-tokens in return.
You’ll pay no fees or premiums and you will earn the same yield as when you would have staked your tokens at the underlying protocol yourself!
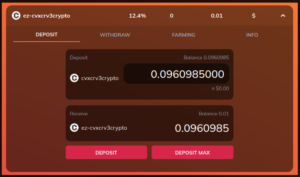
- Step 1: Select the vault that you want to deposit into. Click on the vault to open it. It will show you the deposit field.
- Step 2: either fill in the custom amount of tokens that you want to deposit or simply click the [Deposit All] button to deposit all.
- Step 3: You will see a pop-up that shows the details of your upcoming Deposit transaction:
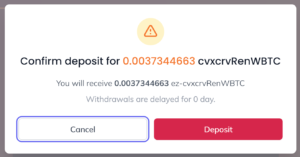
-
- It will show the amount and the name of the token that you are about to deposit.
- It also shows the amount of ez-tokens that you’ll receive in return.
- Below it mentions the withdrawal delay, which typically is a day.
- You can cancel or approve the Deposit transaction.
Two Transactions
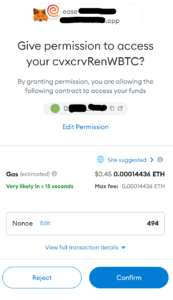 Step 4: You will need to approve 2 transactions:
- The first one is the approval that lets your wallet use your tokens so they can be deposited.
- The second one is the actual deposit.
- The default setting for the approval transaction is that the approval is limited to the exact amount that you want to deposit.
- The benefit is that your wallet and the contract can never deposit more without explicit repeat approval
- The drawback is that if you will be depositing into a vault more often, you will need to approve the token usage every time and pay gas accordingly.
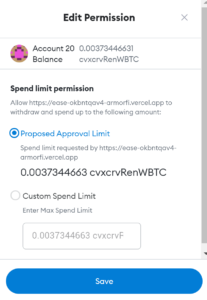 If you rather have a larger approval amount to prevent future gas fees, then you can click the Edit Permission link.
- This will let you input any amount you like.
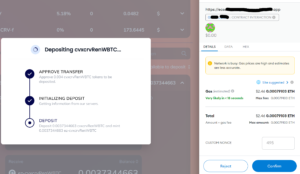
- Once you [Confirm] the approval transaction the screen on the right will appear.
- Once the Approval Transaction confirms, a new transaction will appear.
- At the same moment, the focus on the Deposit pop-up on the right will move to the 2nd part: initializing Deposit.
- You need to [Confirm] this second transaction to deposit your tokens into the ease app.
Withdrawals & time delay
To make a withdrawal navigate to your active deposits. A new “Withdraw” tab will have been added to the vault dropdown.
Here you can withdraw your covered ez-tokens to unprotected underlying tokens. This needs 2 transactions as explained below.
Of course, you can still deposit more tokens as well and add to your protected position.
Withdrawing Ez-tokens
A withdrawal is a swap from protected and yield-bearing ez-Tokens to unprotected (and normally non-yield-bearing) tokens.
A withdrawal needs 2 transactions:
- The request for the withdrawal. This initiates the withdrawal.
- Finalizing the withdrawal. This can be done after a 24-hour delay (subject to change) after the initial request has been confirmed.
1: The request for withdrawal
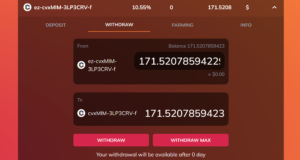
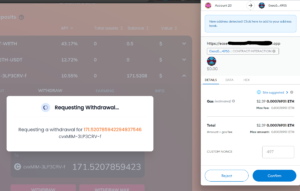 Simply go to the withdrawal tab that will appear in all vaults where you have active deposits.
- Standard, the maximum available amount is already filled in. Clicking [Withdraw Max] will start the withdrawal transaction for the max amount.
- You can of course edit this and withdraw a smaller part of your ez-Tokens, in which case you would use the left [Withdraw] button to start the transaction.
- A pop-up will appear, confirming the amount that is requested
- Simultaneously, a wallet transaction will start, which you will need to confirm to initiate the withdrawal.
2: Finalizing the withdrawal
-
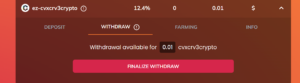 Once the transaction is confirmed, the 24-hour delay starts.
- After the 24-hour delay has passed, the withdraw tab will look like this:
- Click on “finalize withdraw” to receive the underlying assets back into your wallet.
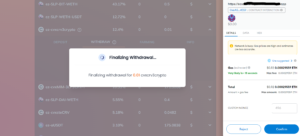 A wallet transaction will start, which needs to be confirmed.
- Once the transaction is confirmed on-chain, your tokens will be in your wallet again.
Withdrawal notification
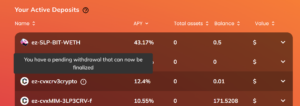
You can visually check if you have any pending withdrawals that are ready to be finalized:
- A small icon of an exclamation mark will appear on the vaults in the list that are ready for withdrawal.
- The same will also appear on the Withdrawal tab.
Important Terms
Please note the following as further explained in the terms of coverage:
- During the delay period, the user’s tokens will no longer continue to earn yield.
- However, they will still retain coverage (they are still covered by the ease Uninsurance system)
- They will also still function as collateral to the Uninsurance ecosystem. This also means that until the “finalized” transaction is executed, the deposited tokens can be charged in case of a hack.