Stake your Armor tokens
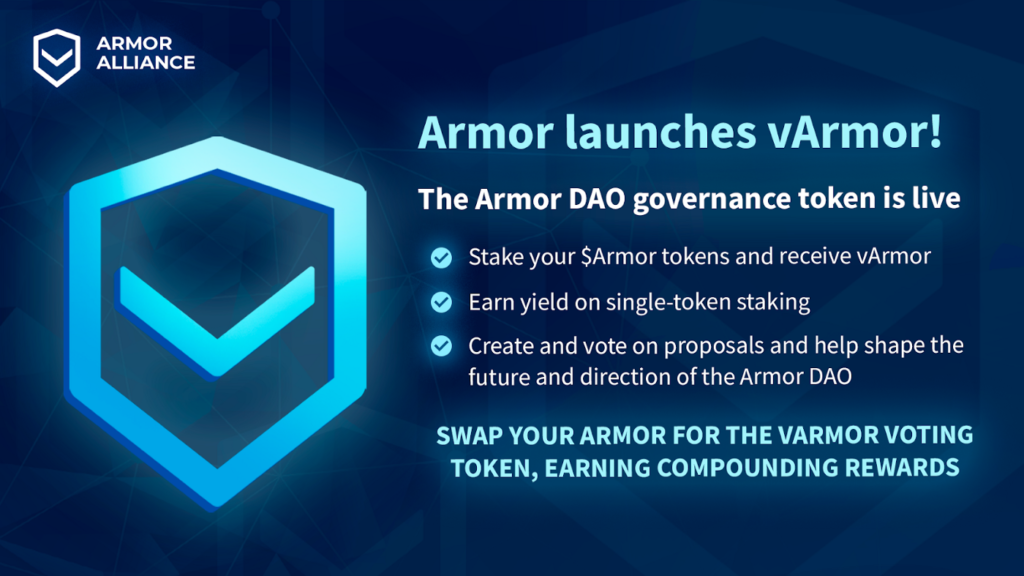
… and get the yield-earning governance token vArmor in return, which can be used to create and vote on proposals.
Armor is proud to present its latest product launch and a big step towards decentralisation of the project: vArmor.
vARMOR is a yield bearing ERC-20 token that is used for governance. It will be used to vote, and put forward proposals to the Decentralized Autonomous Organization (DAO).
C̶u̶r̶r̶e̶n̶t̶l̶y̶ ̶t̶h̶e̶ ̶A̶r̶m̶o̶r̶ ̶v̶o̶t̶i̶n̶g̶ ̶p̶l̶a̶t̶f̶o̶r̶m̶ ̶o̶n̶ ̶W̶i̶t̶h̶T̶a̶l̶l̶y̶.̶c̶o̶m̶ ̶i̶s̶ ̶b̶e̶i̶n̶g̶ ̶f̶i̶n̶a̶l̶i̶s̶e̶d̶,̶ ̶b̶u̶t̶ (edit: the front-end is live at https://www.withtally.com/governance/armor!)
Armor Knights can already swap their Armor for vArmor tokens and earn yield.
The Armor DAO
This step marks a new and important phase in the transition to the Armor DAO as vArmor token holders can discuss about, start and vote on proposals:
- A new discussion forum has already been started, where pre-proposals can be discussed and even put to an informal vote. One does not need any vArmor for this, just an Armor Forum account.
- Once there is clear support for a proposal and multiple options to vote for, a detailed proposal can be made via the WithTally.com on-chain voting platform.
- vArmor users can then vote for any option connected to the proposal.
- Once the quorum is reached, the proposal will be executed.
The voting parameters
Currently, the following voting parameters are defined, but even these can be changed if the DAO votes to do so!

- The Proposal Threshold: this is the amount of vArmor that someone needs before a proposal can be started, currently 1 million vArmor.
- Quorum needed: the absolute amount of votes needed before a proposal can succeed, currently 30 million.
- The Proposal Delay: The delay before voting on a proposal may take place, once proposed. This is currently a few seconds (so voting can start immediately after the proposal is submitted)
- The Voting Length: the period that a proposal can be voted on.
Stake Armor to receive vArmor
To receive vARMOR, a user is required to stake their Armor tokens.
The differences with the other Armor staking farms are:
1: This is a single-staking pool, only $Armor tokens are needed.
2: The rewards are auto-compounding: the vArmor:Armor ratio will start at 1:1 and will increase constantly as more rewards are added to the vArmor vault.
Ad 1: vArmor is a single token staking pool
Previously, Armor rewards were only offered when staking liquidity pools tokens (LPs), which required a specified ratio of $Armor to it’s partner token to stake. Single-staking is overall a more economical option:
- Only one token is required vs 2 tokens in a specific ratio (typically 50:50)
- The user is only required to interact with the vARMOR contract, reducing the amount of transactions and saving on gas fees. To stake LP tokens for rewards a user needs to own or buy two different tokens, interact with the DEX contract to pool those tokens, and then stake the resulting LP tokens in the reward farms.
Ad 2: Auto-compounding yield
Once Armor is staked, and vARMOR is received you will start earning rewards on your vARMOR. The APY is represented in the increasing value of 1 vARMOR to Armor over time. That’s because
vARMOR Value=Armor in contract ÷ vArmor supply.
When a user stakes Armor, vARMOR is minted, however, when rewards enter the contract no vARMOR is minted, causing vArmor’s value to rise, for example:
- User deposits 100 $Armor, 100 vARMOR is minted and sent to the user:
100 Armor in Contract 100 vARMOR supply = 1 Armor / 1 vARMOR
- Now 100 $Armor worth of rewards enter the contract, no vARMOR is minted:
200 Armor in Contract 100 vARMOR supply = 2 Armor / 1vARMOR
As shown from the simple example above, as rewards constantly enter the contract, the value of vARMOR relative to Armor will continue to rise. When a user withdrawals their Armor from the contract, the vARMOR the user had is then burned, so the ratio remains unchanged.
The current starting reward structure is a flat 500k Armor tokens per week. This is subject to adjustment as vArmor rewards and APY should be balanced with the regular farms.
How to swap Armor for vArmor
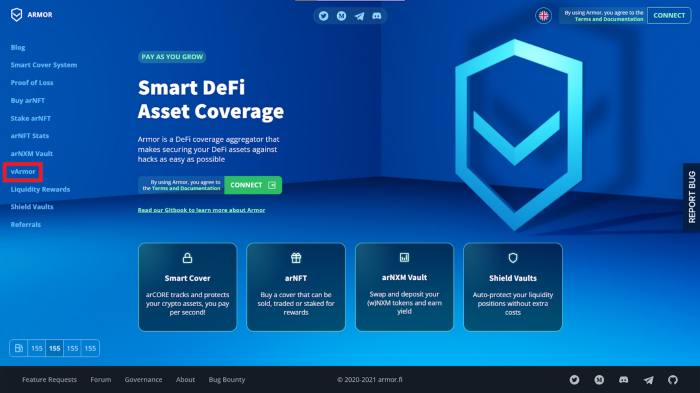
Step 1: Navigate to https://armor.fi/govern or click the vArmor link on the sidebar of the home page of https://armor.fi/, highlighted in red below.
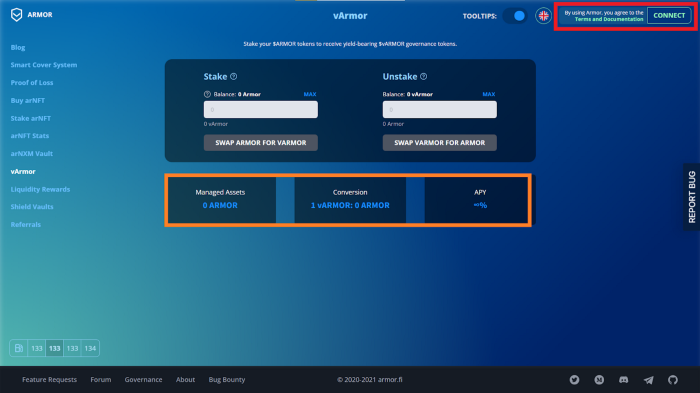
Step 2: Connect your wallet, using the button highlighted in red. If you do not or are connected to the wrong network, it will show incorrect values such as in the highlighted orange box below.
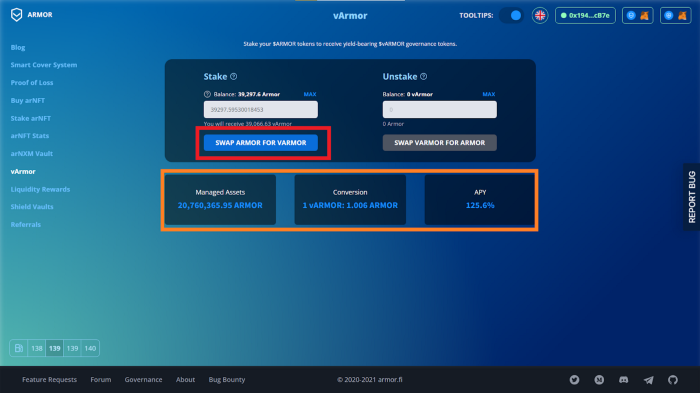
Step 3: Now that your wallet is connected you can see the correct values in the highlighted orange box. Now you want to set the balance of Armor you wish to stake. Once decided, click the button “Swap for Armor for vARMOR”, highlighted in red.
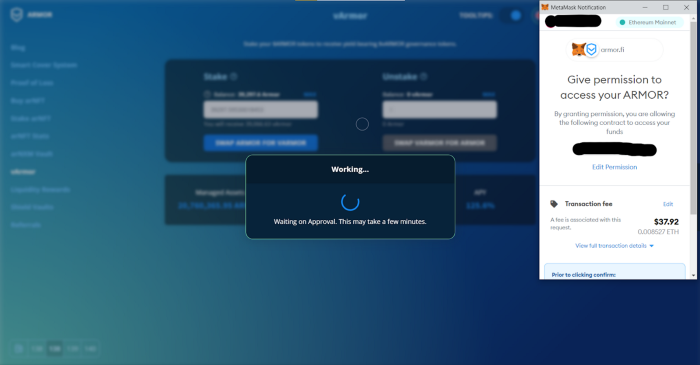
Step 4: After clicking the button, the first of two transactions will begin. The first one is to grant permission to the vARMOR contract so that it may access your Armor. Approve the transaction and wait for it to execute, as a second one will appear after the first.
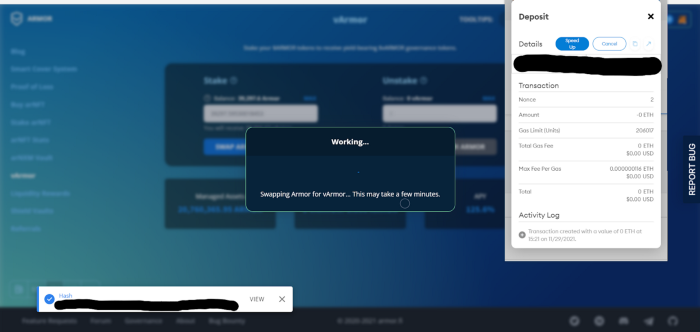
Step 5: After the 1st transaction executes successfully, a notification to approve a second transaction will appear. This transaction is to execute the deposit of Armor into the contract and to send you your vARMOR. Approve this as well and wait for it to execute.
Step 6: Once the transaction executes, you will notice on the page your vARMOR balance, highlighted in red in the image below. That’s it! Nothing else needs to be done.
The rewards that staking generates are represented by the increasing value 1 vARMOR has in Armor.
Your wallet is unlikely to show your vARMOR balance by default.
You can fix this by importing a custom token in your wallet, with the contract address 0x5afedef11aa9cd7dae4023807810d97c20791dec.
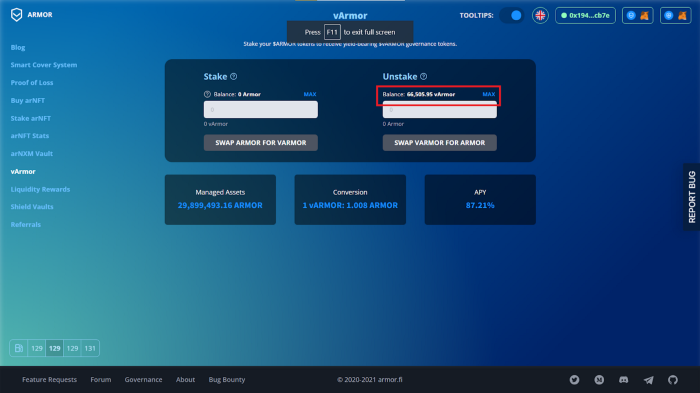
How to Swap vARMOR for Armor
Note: There is a 7 day delay from a withdrawal request transaction to the actual withdrawal transaction. Please keep that in mind when performing a swap back to Armor.
Step 1: Navigate to https://armor.fi/govern and connect your wallet. From there, set the amount of vARMOR that you wish to swap in the field labeled “Unstake”. Once you set the amount you wish to swap click the “Swap Varmor for Armor” button highlighted in red.
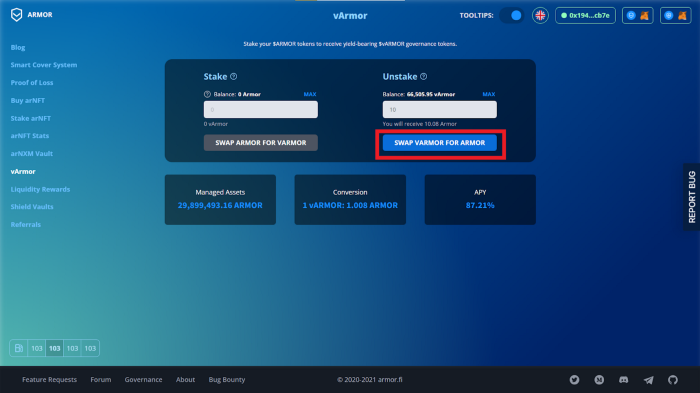
Step 2: After you click the button you will receive a warning informing you about the 7 day delay.
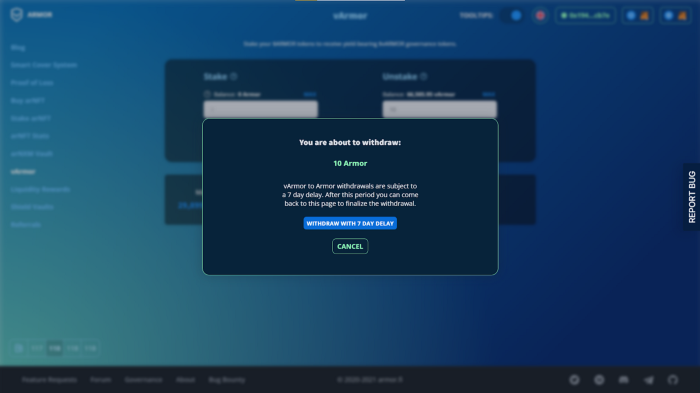
Hit the “withdraw with 7 day delay” button and a request withdrawal transaction notification will appear, requiring your approval (pictured below). Review the transaction and hit approve to execute.
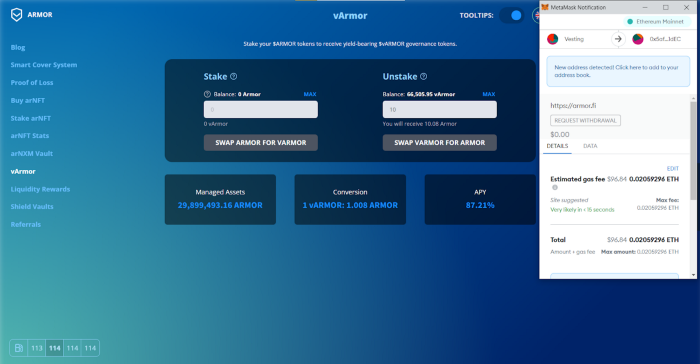
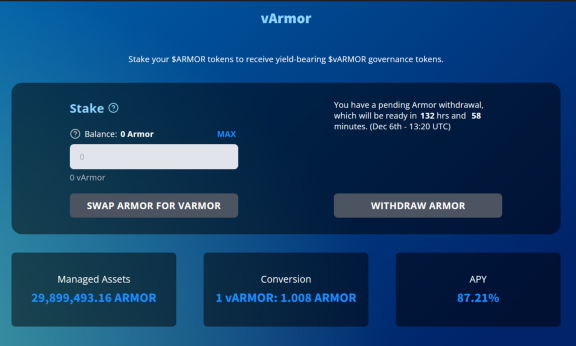
Step 3: After the transaction executes successfully, the vArmor page will now appear with a pending withdrawal notification and a 7 day timer, pictured below.
After the 7 day waiting period is over, return to this page and execute the withdrawal using the “withdraw armor” button. This action will execute a transaction, so plan accordingly to accommodate for the required gas fee.
Once that transaction executes successfully, your Armor will have been deposited into your wallet!
